Pages

Showing posts with label DIY. Show all posts

Wednesday, December 19, 2012

HAPPY HOLI-DIY | a recap of my craft night at Anthropologie


Last night was so much fun - I hosted an event at Anthropologie (you may have heard about it, ha) and to top it off two customers thought I worked there because I "dressed like it" and I had a "great outfit." Two of the greatest compliments of my life right there. Oh, and my mom and aunt came out to support me and they were like my personal fan club so that was nice, too. Hopefully everyone who came to the event had as good a time as I did! We made initial ornaments that do double duty as gift toppers, and a few industrious people even made enough letters to make a word garland! Check back tomorrow for the tutorial. Here are a bunch of photos of the event... much thanks to Matt who stopped by for a little while to capture these images for me. 


Most of all, thanks to Anthropologie for having me and to everyone who came to the event! Hope we can do another one real soon :)

Wednesday, December 5, 2012

HAPPY HOLI-DIY | a craft night with Anthropologie & me!


I have such fun news to share today! I'm excited to announce that I'm partnering with Anthropologie and hosting an evening full of crafting and snacking at my local store in Garden City on December 18th. We'll be making yarn monograms which can be used as ornaments or gift toppers, so come on by and craft with us! 

There are two one-hour sessions and space is very limited so if you'd like to join us, email anthroevents@anthropologie.com soon to reserve your spot at the workshop! Please include your preferred session time in your email. Hope to see you there! 


Wednesday, March 21, 2012

a down home DIY // clean your cast iron pan

Last week I mentioned that I inherited two cast iron pans, one from my mom and one from my aunt, but they were both originally my grandmother's. One was suffering from a bad case of rust but luckily I had just read about how to clean rusty cast iron skillets. Check out what my skillet looked like before...
 
Yes, that is a potato. 

...and after! Chances are you have a potato and some salt on hand, and if that's the case then you're ready to clean your own rusty cast iron skillet. I was worried I would wear my arm out with all the scrubbing but the rust disappeared surprisingly easily and the whole process only took a few minutes. Now I have a nice little cast iron skillet that's perfectly seasoned and ready for many more years of use. Check out the complete instructions here.

Tuesday, March 13, 2012

blog design

(image via Made by Girl by Jen Ramos)

You may have noticed some changes around the tiny hummingbird lately and there are more to come! Once I started changing the look and layout I became slightly obsessed and have been bothering Matt nightly with requests to design new sidebar buttons, resize my banner, change the color scheme... and on it goes. Some days I feel ambitious, temporarily overcome my fear of HTML and CSS, and delve into the world of blogger tutorials. Some days I'm successful, and on those days I regale Matt with exciting tales of how I changed the width of my sidebar! and he gives me a patronizing smile. Some days I am frustrated, and on those days I compile a list of things I need Matt to help me with and persuade him to check off every item on my list before the night is over. To save some fellow bloggers (and their innocent web savvy husbands or boyfriends), I figured I would share a list of the links that I've found helpful. Hopefully these are useful to someone! And if anyone knows how to decrease the amount of space between sidebar buttons, please, do tell.

- I learned how to remove the navbar and remove borders from images from Alli's post
- this post helped me fuss with the width of my sidebar and main column
- I decided against it (for now), but here's how to create three columns
- it took forever, but I finally got my social media icons to work
- I considered switching the sidebar from right to left (for now I'm keeping it on the right)
- how to stop being a no-reply blogger - this is only slightly related, but applies to those of you who read blogs but don't write blogs. Comments are one of my favorite things about blogging, and I read every single one that I get. They're forwarded to my blog email address (thetinyhummingbirdblog at gmail), so I often reply to comments via email. Lately, I've been experimenting with replying in the comments section, but I still think it's probably easier for commenters to receive an email response than to keep checking the comment thread. Anyway, there are times when I receive a comment from someone whose email address isn't visible in his or her blogger profile, and then the address shows up as "no-reply blogger" and I can't respond directly. This issue has been bothering me for a while and I'd been planning on writing a little tutorial on how to make your email address visible in your profile, but then I discovered that one of my favorite bloggers did the work for me by writing this post just last week. Visit dandee for super simple instructions on how to not be a no-reply blogger anymore. Because I want to write back to you!

Any tips or tricks you care to share?

Wednesday, June 1, 2011

automatic confetti

I was working on a project for Ezra's room last week and I realized that the scraps are instant confetti.  I wanted to save them for Ezra's birthday party but Matt talked me out of it.  I guess I'll just have to make more come October! Can anyone guess what I was making?

Thursday, May 19, 2011

wall additions

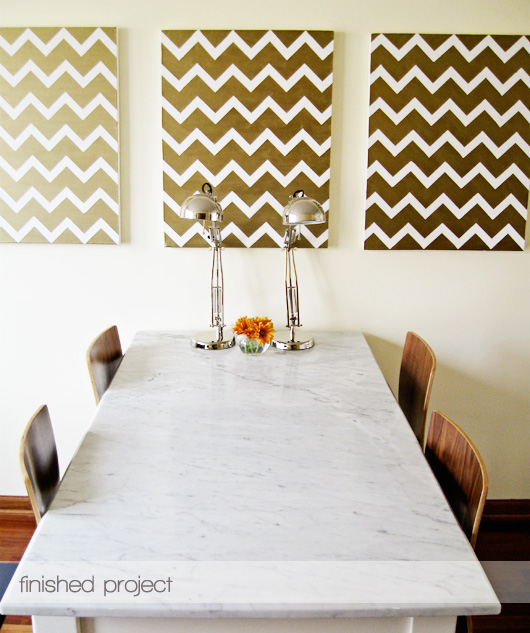
The bare wall dilemma is slowly becoming less of one.  I made my own chevron canvases, albeit not as neatly as Jess's.

Matt bought three canvases at Job Lot for $4.99 each and I spent $0.88 each (and about twenty-five minutes standing in front of the acrylic paint display at Michaels trying to choose a color only to ultimately decide on using a very similar shade of bronze) for three bottles of acrylic paint.  We already had the painters tape.


I won't bother with a tutorial since this isn't my invention, but I will share one tip that Matt thought of.  In order to cut a zillion segments of painters tape I stuck strips of it to my cutting mat and used a little Fiskars rotary cutter and my ruler to cut two inch pieces.  Visit make under my life for detailed instructions.

Wednesday, March 30, 2011

bare walls

'Bare' is the only way to describe nearly every wall in our house.  I've talked about this before but still really haven't done anything to remedy the problem.  Here are some ideas from around the internet that I'm thinking of replicating for our home... 
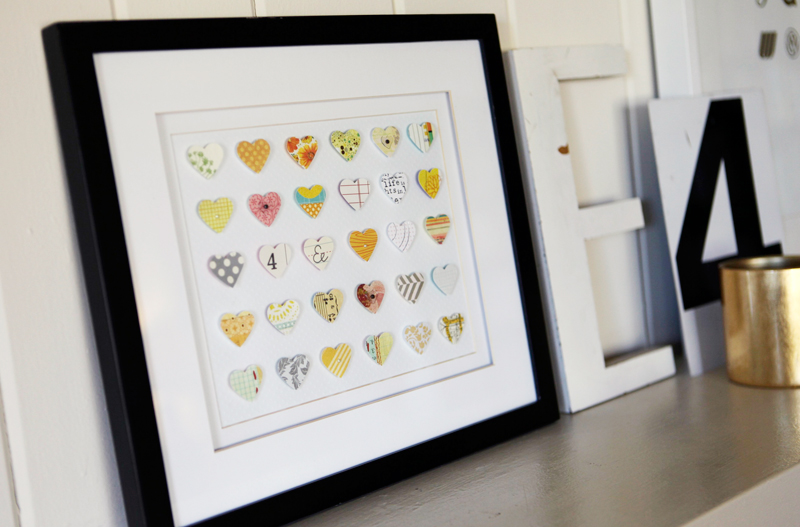
punch collage via Ali Edwards.  maybe stars for Ezra's room.
log cabins via martha. for the living room, over our couch.
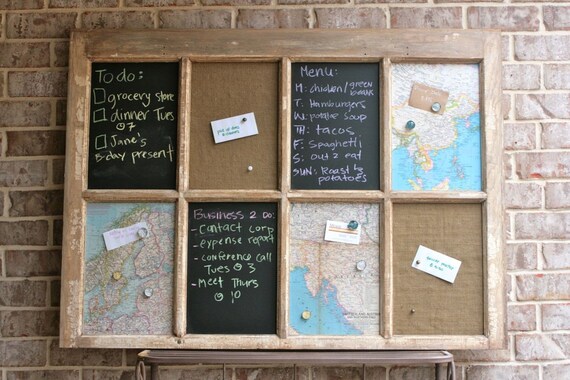
message board via moxie home. for the craft room.
portraits via Eden Lang. for the living room.
chevron on canvas via decor8. for the dining room.
Recommendations for affordable wall art, either DIY ideas or for purchase, are welcome!

Wednesday, March 16, 2011

new use for an old thing

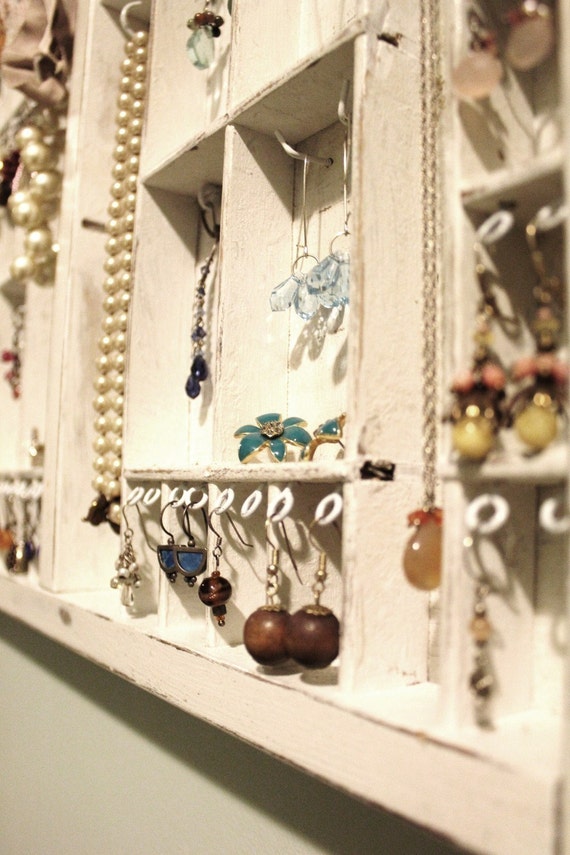
(image via bluebirdheaven)
Have you heard of a California job box?  I hadn't, although there was one hanging in the kitchen of the house where I grew up.  I learned from my dad that its original use as compartmentalized wooden tray was to store all the little metal letter stamps used in a printing press.  
My mom used to have one filled with miniatures, which are basically tiny little dollhouse accessories, but it made its way into the attic years ago.  She recently took it back out and is now using hers to store all manner of thread.
Kimberly Canale suggests using one to display placecards at an event and has a DIY on her blog.
Etsy seller BlueBirdHeaven creates beautiful jewelry displays out of them.
I love these inventive ways of repurposing... find your own California job box on ebay.
Related Posts Plugin for WordPress, Blogger...